How to Create bootable USB from ISO on Mac using Terminal
Open the Terminal window of your mac by clicking the Launchpad icon in the Dock, then type Terminal in the search field, and click on Terminal. Once you have the terminal open make sure the USB device you are planing to use is un plugged, run the following command to get a list of all drives currently attached to your mac.
sudo diskutil listYou should get output similar to what you see below.
/dev/disk0 (internal, physical):
#: TYPE NAME SIZE IDENTIFIER
0: GUID_partition_scheme *500.3 GB disk0
1: EFI EFI 209.7 MB disk0s1
2: Apple_APFS Container disk1 499.9 GB disk0s2
/dev/disk1 (synthesized):
#: TYPE NAME SIZE IDENTIFIER
0: APFS Container Scheme - +499.9 GB disk1
Physical Store disk0s2
1: APFS Volume Macintosh HD - Data 347.4 GB disk1s1
2: APFS Volume Preboot 660.9 MB disk1s2
3: APFS Volume Recovery 1.1 GB disk1s3
4: APFS Volume VM 2.1 GB disk1s4
5: APFS Volume Macintosh HD 15.4 GB disk1s5
6: APFS Snapshot com.apple.os.update-... 15.4 GB disk1s5s1
/dev/disk3 (external, physical):
#: TYPE NAME SIZE IDENTIFIER
0: GUID_partition_scheme *15.8 GB disk3
1: EFI EFI 209.7 MB disk3s1
2: Microsoft Basic Data USB 15.6 GB disk3s2
Take a note of what storage devices you have currently connected, then plug in the USB device you intend to use and run the “diskutil list” command again.
sudo diskutil listThis time your list should include the newly connected USB device. As you can see below our new device is “/dev/disk3”. This extra step might seem unnecessary, but trust me it is worth doing it. I can’t tell you how many times I’ve wiped the wrong USB because I was pretty darn sure it was “/dev/disk2”, that I intent do use ;).
/dev/disk0 (internal, physical):
#: TYPE NAME SIZE IDENTIFIER
0: GUID_partition_scheme *500.3 GB disk0
1: EFI EFI 209.7 MB disk0s1
2: Apple_APFS Container disk1 499.9 GB disk0s2
/dev/disk1 (synthesized):
#: TYPE NAME SIZE IDENTIFIER
0: APFS Container Scheme - +499.9 GB disk1
Physical Store disk0s2
1: APFS Volume Macintosh HD - Data 347.4 GB disk1s1
2: APFS Volume Preboot 660.9 MB disk1s2
3: APFS Volume Recovery 1.1 GB disk1s3
4: APFS Volume VM 2.1 GB disk1s4
5: APFS Volume Macintosh HD 15.4 GB disk1s5
6: APFS Snapshot com.apple.os.update-... 15.4 GB disk1s5s1
/dev/disk2 (external, physical):
#: TYPE NAME SIZE IDENTIFIER
0: GUID_partition_scheme *15.4 GB disk2
1: EFI EFI 209.7 MB disk2s1
2: Microsoft Basic Data USB 15.2 GB disk2s2
/dev/disk3 (external, physical):
#: TYPE NAME SIZE IDENTIFIER
0: GUID_partition_scheme *15.8 GB disk3
1: EFI EFI 209.7 MB disk3s1
2: Microsoft Basic Data USB 15.6 GB disk3s2Now that you know that you want to make bootable USB on “/dev/disk3” You can go ahead and download the source. For this example I will use .iso file with Debian 11, any other Linux system should work as well. To download it I will use the command below. You can obtain your .iso in your preferred way, just make sure to remember your download location.
curl -L -O https://cdimage.debian.org/debian-cd/current/amd64/iso-cd/debian-11.6.0-amd64-netinst.isoOnce you have your .iso file you can go ahead and make some final preparations before you make the USB bootable. First go ahead, and unmount it. Even though it is not required, it is a good practice to unmount your USB.
sudo diskutil unmountDisk /dev/disk3At this point you should be ready to make your USB bootable, to do it run the following command. Make sure to replace ./debian-11.6.0-amd64-netinst.iso the patch to your .iso file, and /dev/disk3 with the path the the USB you intend to turn to a bootable USB.
sudo dd if=./debian-11.6.0-amd64-netinst.iso of=/dev/disk3 bs=1mThe whole process could take a while depending on the size of the .iso you are using, and the speed of your computer. Once you are done you should see similar output.
388+0 records in
388+0 records out
406847488 bytes transferred in 94.024237 secs (4327049 bytes/sec)
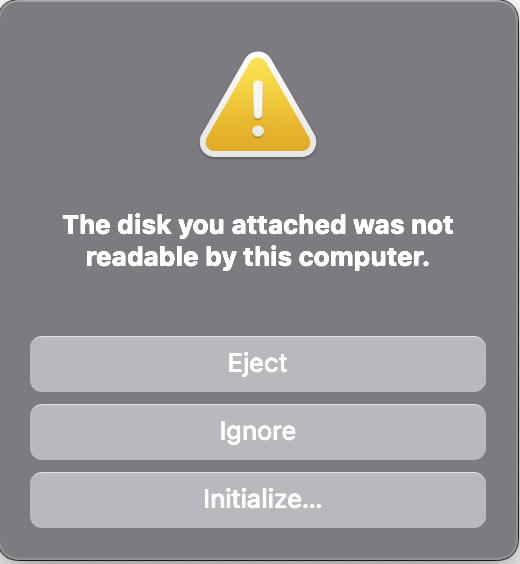
Also your Mac will give you the following warning, you can go ahead and click on Eject.

Your Bootable USB should be ready to use now!